Wednesday, March 26, 2014

OMG ITS SHU UEMURA SUPER COLLECTION DAY

Heeey guys, this is what I've been building up to in the past 2 weeks, I'm going to show you my Shu Uemura collection of makeup and I feel that Shu Uemura is so under-reviewed! Maybe cause it's just not as popular in North America as in Asia but trust me, this brand is awesomeee! I got this entire collection as a 17th birthday present from my aunt Dorothy (<3) and when she hid the receipt from me, I just had to look at the prices online.... EXPENSIVE! Just a warning, this is going to be a very long post so lets go! Btw feel free to just skip to a certain item if its what you searched on Google and are thinking of buying but are questioning the price :)

[update]: I just wrote the entire post and it took about 3 hours. DON'T TRY TO READ EVERYTHING UNLESS YOU'RE A SPEEDREADER. God that took forever....

First off, this is the makeup case that I bought from Forever 21, I just thought that it's totally sophisticated and goes well with my Shu Uemura stuff, makes me feel classy and expensive hahaha
 So this is what I have (forgot my eyelash curler and makeup brush cleanser) and yeah okay it looks like a wimpy "super collection" but come on, I'm a teenager and each item is really expensive so it's better than all drugstore, right?
This is the POREraser UV Under Base Mousse in beige and it costs about $50. This product can be used as a primer or be a sheer foundation. What I love about this product is that it's a mousse and you get cream, powder or liquid foundations so this is something new and because it's a mousse, it's light and doesn't feel heavy on the skin. The only thing I would caution about is that it is again quite sheer and I don't recommend this for dry skin because it might sink into those dry spots on your face and will start flaking. I personally use this in the summer when I tend to be a bit more oily and that way, it gives me a nice and dewy finish. Also because this is one of Shu Uemura's top products, they have quite a bit of tutorials on their website and it even shows you step by step in pictures if you're too lazy to watch the video. The way I was taught at my Shu Uemura class (my aunt's perks of being one of their insider club thing) is that you shake the bottle approximately 5 times then pump out a lychee sized bubble of product onto your palm. Make sure that the bottle stays upright when it dispenses and you are turning your hand, not the bottle. Overall, a nice product but I'm not sure if I would get a new one once this one runs out 
To apply the base, my aunt bought me their pentagon sponge. There's 4 in a package and the package is about $7. Although this sponge is made with natural latex, I find that it doesn't soak up product like most natural products and its very bouncy but it's still only a sponge and four for $7? Not necessarily worth the price when I can get so many sponges for less if I drop the brand name.
Now after you've applied your base, you need a powder to set it. The one I have is the Dual Fit Pressed Powder in beige I think and it is what it is: a powder to set foundation/base.

 This is the brush that comes along in the compact. As you can see, it's slanted which makes me wonder if it's a better fit for contouring with bronzer rather than setting your face with powder.
 This is what the product actually looks like. As you can see, there are two different shades within the compact and they actually have two different purposes. The powder on the left side is darker and made for your entire face so it's the normal powder. But the one on the right is actually made to soak up excess amounts of oil, therefore it goes in your T-zone. I feel like this powder isn't always very necessary because other powders will do the same job for less (although without the T-zone thing) and might make my face have that glow too.
Next up is the Lasting Gel Pencil Eye Liner and I have the shade M Brown 02, and it costs about $24.
 What I like about this eyeliner is that the pigmentation of the brown is great and the fact that it is a retractable pencil but sometimes, the pencil doesn't apply easily to my lid. I think it's better to draw a line on your arm first and warm up the pencil then go for your eye because if you go straight to the lid, you might have to go over the line and pull and tug a bit (which is bad) in order to get the beautiful brown to come out. Swatch is coming up later
This one is the Eye Light Pencil and obviously, mines white. It costs about $19 and has one side which is matte and the other which is pearly with shimmer. The matte side is great on the lower lash line and water line if you want to create a comic book character's huge eyes or just make your eyes look bigger overall whereas the pearl side is great for the inner tear duct where it just brings a nice highlight without being too overpowering. I think the pearl would also work under the brow bone but needs to be blended out a bit.
 So these are the swatches of my pencil eyeliner. As you can see, the retractable brown pencil is a very nice brown colour and for the eye light pencil, the pearl is very shimmery and the matte is truly matte. The pigmentation for all of these eye liners are great and what you see in the tube is what you will get on your eyes.
Next is the Hard Formula in hard 9. Hard 9 is actually a pretty interesting colour because its a darker greyish-brown that looks really nice on my black brows. I couldn't do a swatch of this colour for you because the cool thing is, the pigmentation is only released when it detects the oil on your brow hairs. That is cool. That is technology. That is approximately $23.
 I apologize for my brows and my hair and my face overall but mostly brows, I reaaaaally need to get them done soon so its like ahhhhhhh but thats how they taught me to use the brow pencil. If you buy it at Shu Uemura specifically and not Sephora, they will sharpen and cut the pencil like this for you, which makes it even better for your use.
So as you can see from the picture below, I have long eyelashes (yay!) so all I have to do is curl the top ones, right? RIGHT.
This is the New Generation Eyelash S Curler for about $24. It was specially made for those people with eyes that don't necessarily fit into the general shape of regular eyelash curlers. This curler has both positives and negatives in my opinion:
PRO: its smaller and easier to carry around
CON: the plastics that cover it sometimes slide off
PRO: good for those with different eye shapes
CON: you have to curl your eyelashes in sections which may make them uneven/unequal in their curl

 So I guess in some ways, it's easier for people who are scared of poking themselves with a regular eyelash curler (?) and give people new options because this kind of eyelash curler has never been done. BUT you need quite a bit of control in order to get the same uniform curl throughout your eyelashes
Next is the fun stuff, eyeshadow and blush. Now everything that I have below is from their Eyeconic Collection from summer 2013 so these might not be available anymore but I feel that they might represent eyeshadows somewhat well. So as you can see below, I have put one eyeshadow and one blush in each travel palette. Isn't the case pretty? The case itself cost about $14USD I think, each blush is about $42CAD/$35USD and each eyeshadow trio is about $?CAD/$30USD. 

 BUT you can change things around and on the palette where it says shu uemura, you have to lightly pull and it will just slide out for your convenience so based on what colours you want to wear, you can change it up and carry it with you.
 So these are the swatches for the eyeshadows, there is a light purple shimmer, matte lavender and a matte deep plum in Allure Mauve (the purple eyeshadow trio) then there's a gold shimmer, matte pale yellow-gold and dark matte brown in Gypsy Brown (the brown eyeshadow trio). The two solid colours are always very pigmented (especially the darkest one) but the shimmer usually has quite a bit of fallout therefore I usually just pack it on as pigment over top of the look I created with the other two shades. Just a reminder, YOU NEED EYESHADOW PRIMER TO MAKE IT LAST LONGER AND MORE BEAUTIFULLY!
Okay so I actually forgot to swatch the blushes for you so I had to get up and do it... So first, I'm doing the orange blush named Fresh Apricot. On my skin tone, it looks great as I get it on my fingers but once I swatch it on my arm....
 Oh my gosh my arm doesn't have a dark area after the pigment, that's just the camera shadow! And sorry for the finger in the top left hand corner... Anyways, you can't see the shimmer! It's actually right below the orange and that's also why I think it works best as a highlight when I apply this orangey blush. I actually haven't used it much yet (as seen from the pan) but that's what I'm hoping to research now as we head into spring trends and the sun-kissed glow look.
 Here is the pink blush, and I'm told it's called Sweet Pink, isn't it gorgeous? Honestly, the colour pay off is much better when you use a brush but this is what I managed to swatch for you. I wear this blush whenever I do my full Shu Uemura face makeup and I swirl the two colours together in the pan, so its a highlighting blush. I think the rosey pink also would look great on many skin tones and bring out the natural flush in your cheeks!
 Again, apologies for bad camera....
IF YOU ARE STILL HERE AND READING, GOOD JOB FOR PERSEVERANCE! WE'RE ALMOST DONE! 

My aunt went crazy and also decided to buy me two brushes: the 5R and the 17. 
 First below is the side view of the 17 brush. It's a blush brush made of pony and squirrel hairs so its completely natural and tapered as you can see from the side view. From having this about 8 months now, it actually hasn't lost many hairs although a few have frayed and I think it's really nice for swirling blush because of the softness. I don't think this brush is available in North America but it is about $50 in Hong Kong (where I got it).
 Next is the 5R brush which is made of full kolinsky. If you know anything about kolinsky or this post just inspired you to Google it, it's some kind of weasel-animal that comes out once a year or so and it's fur is hard to collect therefore that justifies how this brush is $75CAD/$60USD... Wow right? Good thing my aunt bought this for me in Hong Kong where it's little over $50... That is A LOT for one single brush, especially since I don't really know how to use it properly. The way the store taught me is that you tilt the brush and apply on the slant (the brush should not look like it could stab you in the eye). But its actually quite nice at application and has pretty firm bristles but is still soft enough to blend slightly if you wanted it to (even though that is definitely not suggested).
I'm tired of sounding pretty... FREE LIPGLOSS SAMPLE. 
 Red in the bottle.....
 Sheer and slightly coral-pink when applied... I'm sorry, I don't typically like these kinds of glosses (I'm more of a lipstick/lip balm person) but it seems pretty smooth and when I touched it afterwards, it wasn't sticky so that's definitely a plus! How sheer it is definitely wasn't what I was expecting though....
THE LAST ITEM! Brush cleaner. Okay so since my brushes are really expensive, I trust the brand it came from to give me nice brush cleaner. So Shu Uemura's brush cleaner is nice and cleans the brushes really well except two problems:
1. it smells REALLY strongly of alcohol
2. my brushes love to just soak it up
#1 is what turns off a lot of people from using this brush cleaner and push them towards MAC's instead but with my expensive Shu brushes, I think I'll stick to trusting Shu. This is good for a spot clean and it will dry in a few hours without the smell (thank God) but if you look at my bottle, i already went through about a quarter. Unfortunately, I've only used this brush cleaner about 3 or 4 times and my Shu brushes just suck up the formula. What I love about this cleaner is that it leaves my brushes extremely soft so I think I'll have to see what happens... Btw the cup next to it isn't included, it cost a little over a dollar and then I realized that it's not really worth it but it's not like I'll put strong alcohol in my hands #eczemaproblems
THATS IT. I'M DONE. PEACE!


xoxo, Michelle

Tuesday, March 25, 2014

Concealers: Maybelline Fit Me and Neutrogena Skin Clearing Blemish Concealer

Hello people! Okay so I'm getting sick (headache, sore throat and my eyes hurt when I look up for some reason...) but I persevered and here I am trying to get a review up for you guys. So as you can probably tell from my title, I'm going to talking about concealers today so this doesn't even qualify as a review I guess :)

Concealers: they're made to conceal any imperfections/blemishes/red spots that you may have on your face. The two concealers that I have is the Maybelline Fit Me Concealer and the Neutrogena Skin Clearing Blemish Concealer. So as you can see from the picture below, the two different concealers have really different shades and I personally use them for different things. And I apologize for the bad lighting, I felt sick so I didn't feel like getting up to take photos (but then the swatches turned out yellow so I absolutely had to move)
 This first one below is the Neutrogena Skin Clearing Blemish Concealer and I own the lightest shade Buff (09). In most drugstores when you buy products, they let you play with a tester but Neutrogena products are fully packaged/sealed so I guessed my shade. Since it's a concealer, I think its generally better to have it lighter than darker anyway. So it has a strange sponge type applicator with a hole in the middle where the product is dispensed. This does allow for decent precision when applying and since it's surrounded by stiff sponge, it's decent at blending. I actually bought mine in a shade too light because I find it doesn't blend or look right when applied to any healing acne. It provides a very sheer coverage and although I trust Neutrogena with my acne and sensitive skin, I bought the wrong shade so this product didn't turn out for me. And I didn't see how it was "clearing my skin" but maybe it's subtle?
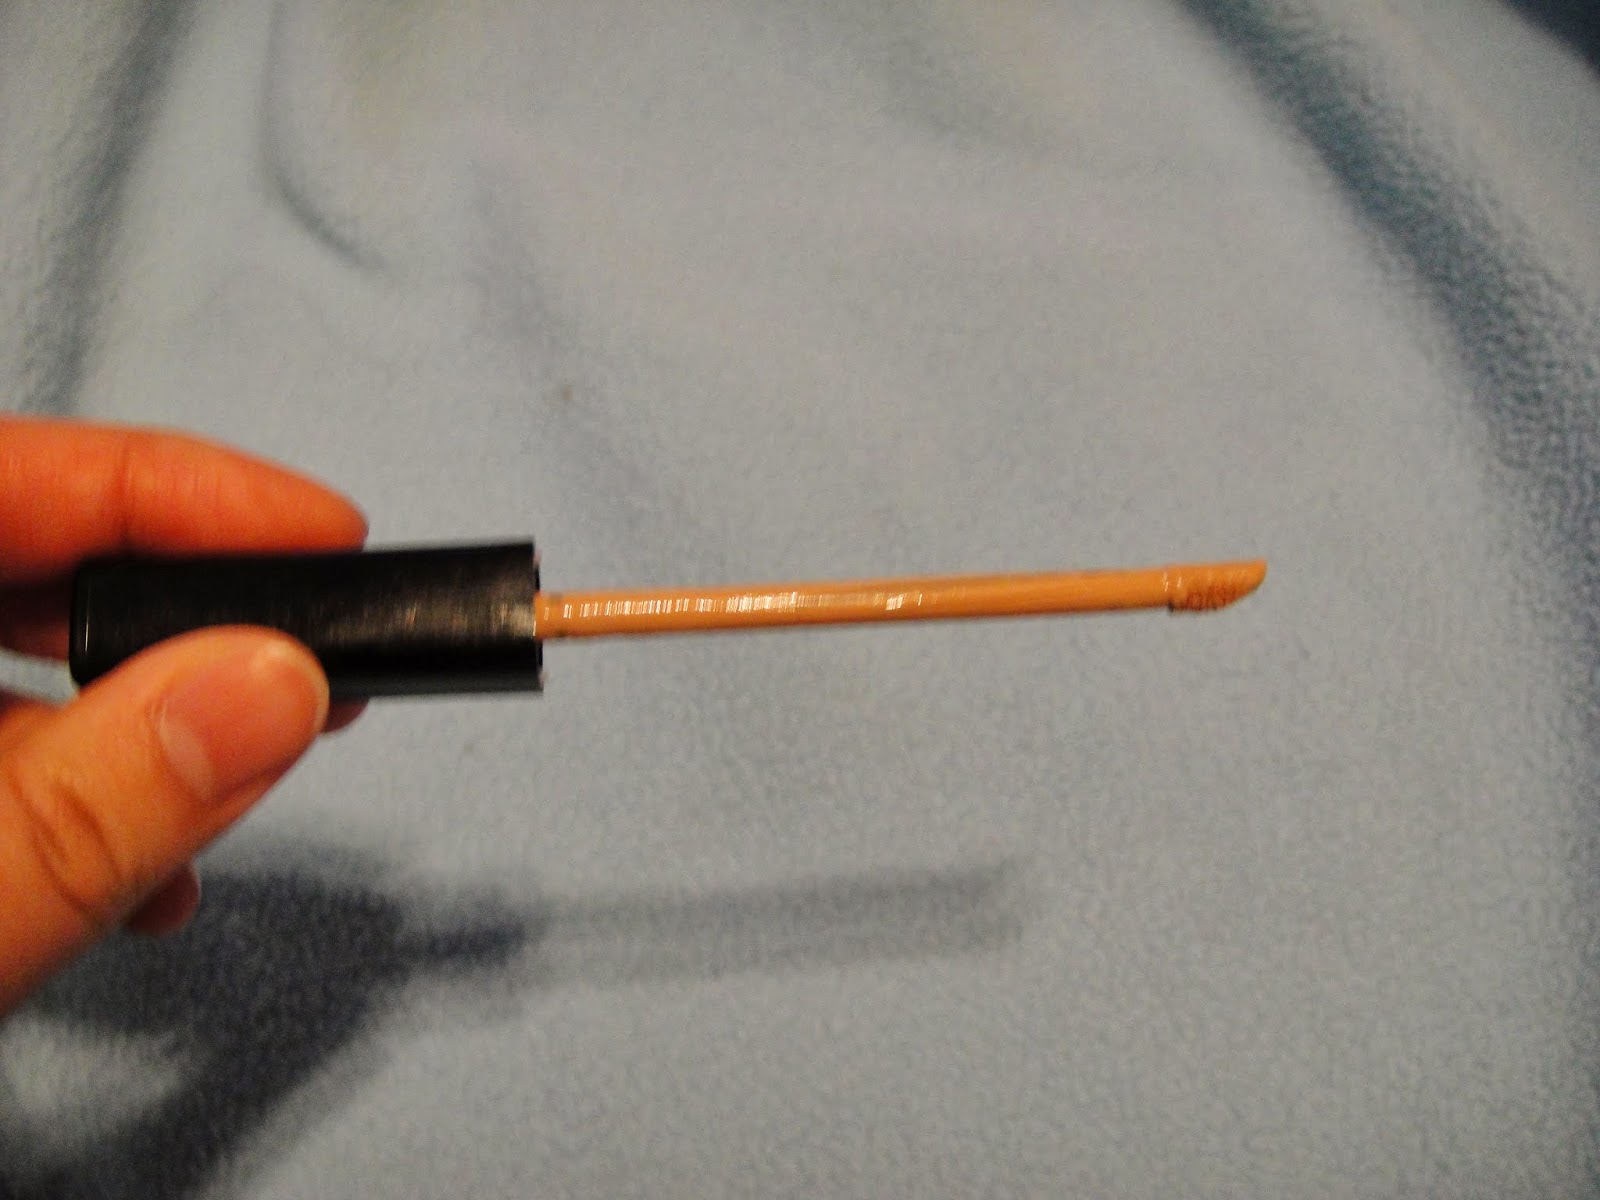
 Okay this one below is the Maybelline Fit Me and I have the shade Medium (25). Although it looks really dark in the photo, it is actually the colour of the swatch (sorry this was the lighting issue). It's very liquidy and on me, I think it provides a medium to full coverage. The only thing I would worry about for this concealer is that it is VERY liquid (just look at the sheen on the doe foot applicator rod) and you'd need to set it with powder after application. Because I typically use the Neutrogena concealer for any skin problems, I mainly use this concealer under my eyes. I don't actually have much of dark eye circles in the first place (YAY) but sometimes you still want that brightness under your eyes, you know what I mean?
 So from looking at the swatch, you can see how the Maybelline Fit Me is very much a liquid concealer and this is the true colour of Medium (25). Although the Neutrogena concealer seems to brighten up my skin and disappear in this photo, the colour on my inner forearm is MUCH different than the colour on my face but it shows the true colour of the product.
So I don't know what this post is, since its not technically a review yet somehow I started reviewing my items... So I hope you enjoyed my blab and that it may be beneficial for you or at least not boring! :)

I LIKE THE MAYBELLINE ONE MORE! And it is also used by makeup professionals such as Marlena from Makeup Geek!  

xoxo, Michelle

Monday, March 24, 2014

Urban Decay 24/7 Glide-On Eye Pencils

Hello my people! Today I'll be reviewing/talking about the Urban Decay 24/7 Glide-On Eye Pencil! Sorry this one is much later than when I usually post my reviews but I spent 4/5 hours today doing a DIY makeup brush holder, with my friend Jenika, which is still not done (so I can't show you guys yet) but hang tight and appreciate the suspense I'm creating right here.... So as you may know, Urban Decay has a pretty good reputation and although there are about 40 of them (holy carp! yes, carp.), the pencil eyeliners definitely didn't disappoint so let's get started!

Packaging: Okay I don't want to talk much about the packaging because it is slightly boring but I'll just sum it up: it's simple but pretty. I guess the main theme for these pencils is metallic and colour because that's pretty much what they are. They are metallic for the box and both ends of the pencil, and are a nice and bright colour. 

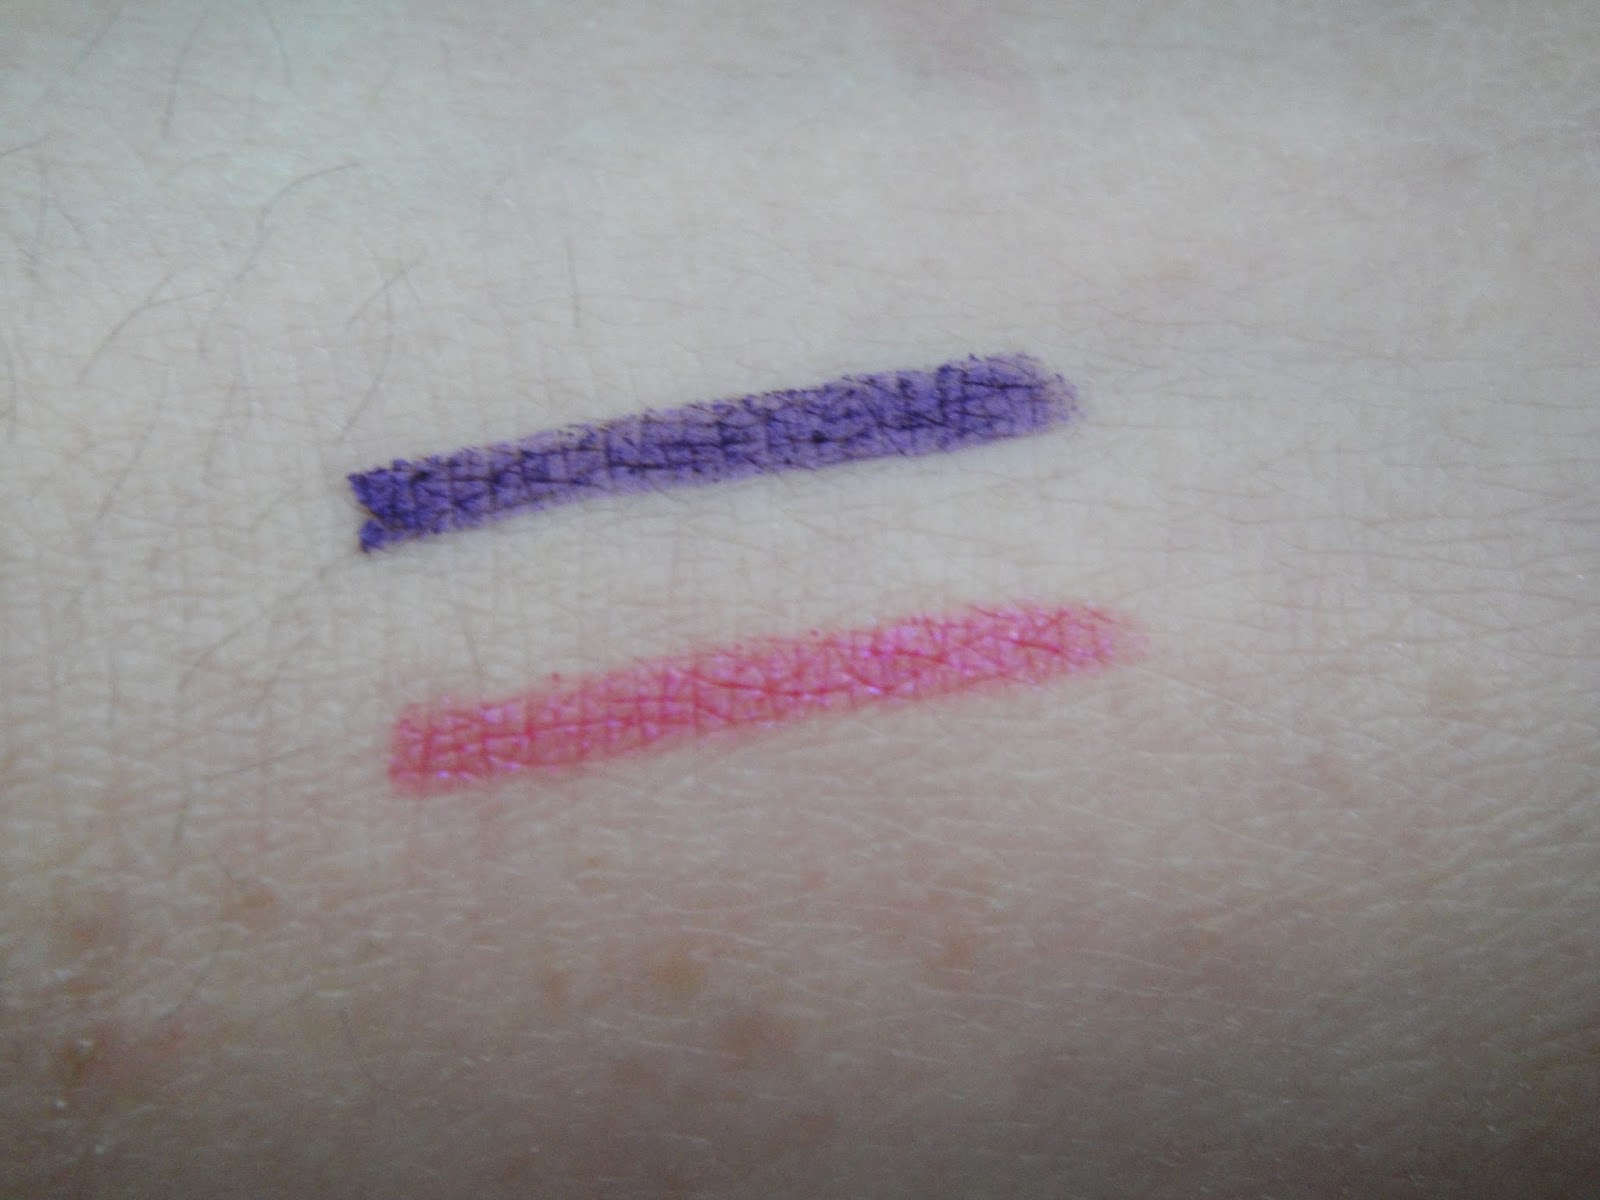
OKAY that's done! Now let's move on to the interesting part: the function of these beautiful eyeliners! I have two of them, in shades Psychedelic Sister and Woodstock.
Psychedelic Sister: sparkly plum
Woodstock: hot pink with a small amount of glitter
Overall, I think the pencils are an amazing product. In the product description it says that they will be creamy and smooth for about 30 seconds then once that's past, it's pretty much set. And to my surprise, I found that to be true!! After doing the swatches on my hand (sorry for bad winter skin), I was rubbing it for a good 5 minutes and not even one sparkle moved! The lines also didn't feel chalky or anything, it stayed nice and creamy. Just before dinner, I also washed my hands and nothing moved!! Even I was shocked! Not a sparkle faded, not a pigment strayed, it's perfect @.@ Now moving on to the colour, aren't they gorgeous? I chose dark purple and hot pink because they're jewel tones so they compliment the brown eyes that I have but also because you don't find shades like that with any other company! You can find a mediocre black eye pencil at the drugstore but where am I supposed to have hot pink? I feel that if you're a bit too lazy to do a full eyeshadow look and you're running out the door, coloured eyeliner is at least a good solution. So the great thing about Urban Decay is that they made 40 DIFFERENT SHADES of this eyeliner and it's definitely very very very very appealing. No other brand has invested so much time and money into developing different and bright colours that pop. The colour range is very diverse but even in their neutral ones, the line drawn is very very vibrant but not at all too eye catching. They have almost every single colour (except red...?) in matte and shimmer AND you get a variety of shades within that colour! What's great is that the colour that you see on the box sticker and the packaging of the pencil is exactly what you get when you draw a line. The pencils are creamy, bright, have great staying power and don't smudge/crease easily after they have set. Just by having two and trying a few different shades in Sephora, I know for almost a guarantee that all shades will come out as amazing as the ones I own and will bring out your eyes. There is so much versatility that you can do almost anything you want with these pencils and they are just a subtle pop that can be so pretty! Honestly guys, do I even have to keep going? These pencil eyeliners are just so amazing that I can't stop (insert Miley Cyrus even though I prefer her old look/style from when she was a Disney girl). 

xoxo, Michelle

P.S. do you like my approval sticker? took me a while on Illustrator to get those swirls right but if it works, then it was time well spent :)

Thursday, March 20, 2014

Whoa.

WHOA. I have 99 page views. Even though that sounds pretty pathetic compared to some people, I've never had that many views on a blog before (cause I usually abandon the blogs after a few posts) so thank you to everybody and you who is currently reading this for coming to my blog and encouraging me to keep going :) woohoo, 100-1!!!

xoxo, Michelle

Maybelline EyeStudio Colour Pearls Marbleized Eyeshadow in Downtown Denim

Hey people, its day 4 of my blogging stream and although I had initially said I'd be doing the CoverGirl Flamed Out Shadow Sticks, one of mine was melted by the time I opened it and I lost the receipt so I'll have to see if Walmart will take it back anyways! So instead of that, I'll be doing the Maybelline EyeStudio Colour Pealrs Marbleized Eyeshadow in Downtown Denim. So I got this eyeshadow on a whim because Target and London Drugs had it on cleareance so I literally said, "why not?" :D

Packaging: I'm waiting for the day when I can say that the packaging is gorgeous like the Too Faced Pretty Rebel Palette (open the link and wow I just LOVE Too Faced's packaging for everything!!) So back to this, it's drugstore average AGAIN. Has the name, has the shade, and unlike the CoverGirl (CG) quad in Coffee Shop, the sticker with the name on it has a rippy thing so you don't have to peel the entire thing off! Yay. 
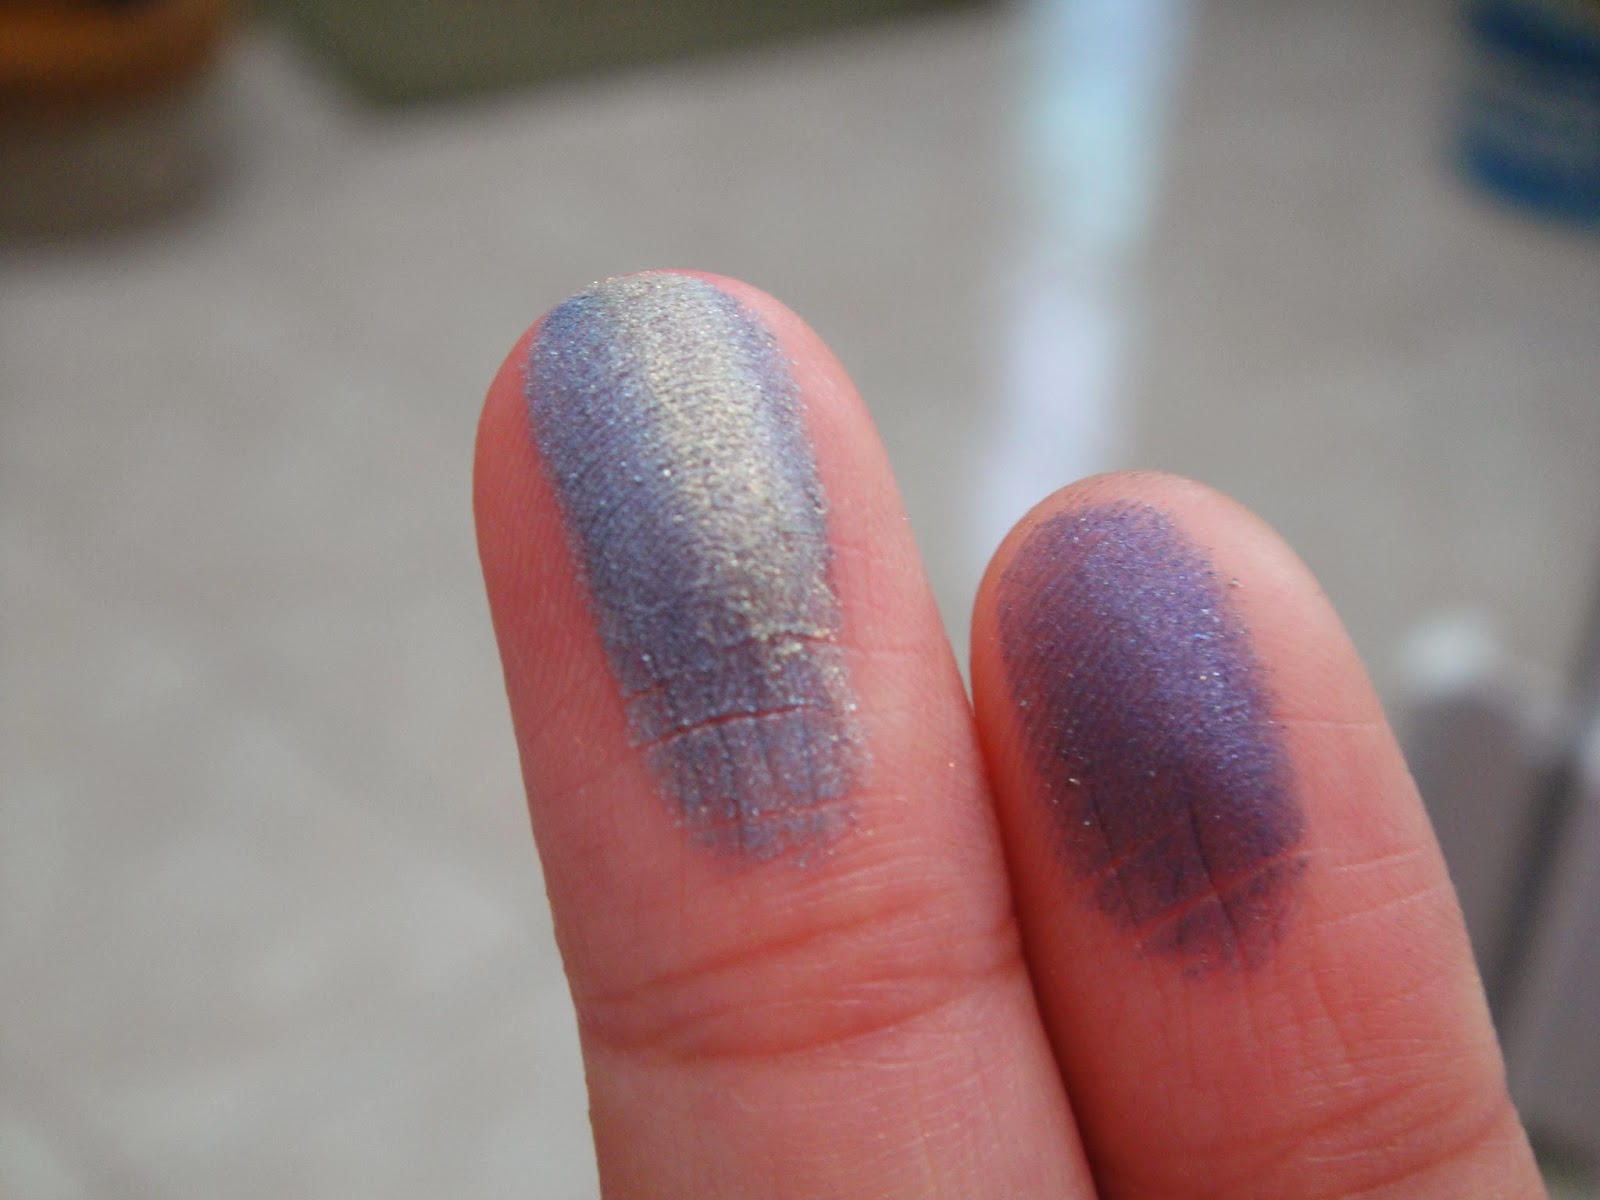
 So I opened the lid again for you guys and as you can see, there's two colours. The one on the left is a navy blue whereas the one on the right is a "marbleized" mix of light blue, gold and dark blue. Both shadows have shimmer but I find that it is slightly more noticeable on the navy blue side since the sparkle is so bright and the navy is so dark.
So the thing I forgot to mention earlier about packaging is that this product has the word pearl in its name. So therefore, Maybelline manufactured it as a dome shape. In my opinion, its pretty unique for drugstore shadows but now Sephora Collection's baked palettes are all dome-shaped so maybe not as cool as I originally thought.... Something worth noting for a drugstore product though!
So since it's a dome, I felt like rubbing my fingers instead of tapping it so after rubbing it once or twice over the palette-thing, this is what my fingers looked like. Really nice and pigmented!
 I swatched it on my arm and this is what the pigment turned out with. As you can see, once you apply the light blue shadow, the gold just makes it seem more metallic and helps it stand out instead of being super prominent and contrasting like it seems on my finger.
To conclude (wow that's like english essay worthy), this is actually a nice duo in my opinion. The marbleized light blue/gold/navy on the right side isn't something you find very often, especially with drugstore brands, and I think this one is really pretty! The texture of the shadows isn't chalky and it's kind of powdery but that's okay :) The only cautionary thing I would say about this is that if you look at the very first picture, you can see that there's quite a bit of shimmer in the black plastic holding the duo so therefore there is a bit of fallout. But its honestly not too bad and the sparkles are so teeny you probably wouldn't notice anyway. I bought this at $4.89 at Target Canada when it was on sale a couple months ago but apparently its on sale right now for $2.98 at Target in the US and online... great..

I'm tired of giving scores out of 5 because that is so cliché and at the same time, it's one of those things I feel that reviewers should do, or at least we should have a stamp-like thing that says approved (inspired by Musings of A Muse) so I'll see what I can do on Adobe Illustrator (btw if you scroll up and you see my Maybe Makeup tree, I drew out every single point on Illustrator!! Took me an hour and a half but it was so worth it!) so I think by Monday or tomorrow, I'll have to come up with something different for you guys!

xoxo, Michelle

Wednesday, March 19, 2014

CoverGirl Flamed Out Shadow Pots in Molten Black and Red-Hot

Hello!! Welcome to another day (3) of my daily makeup review blogging!! So what I'm reviewing today is the CoverGirl Flamed Out Shadow Pots. So this collection by CoverGirl was originally inspired after the Hunger Games: Catching Fire and the minute I heard about it, I was completely obsessed with buying it because if you look at their website, all of the capitol looks are so awesome! So I bought two: Molten Black (300) and Red Hot (345). Let's start with all the in-depth stuff...

Packaging: Okay so again, its average packaging. It's clean, simple and gets the point across that it's a CoverGirl product. The only thing I don't like is that the lid screws of really easily so if you toss it around in your bag at some point, the lid might come off by itself. That's never happened to me personally, but I swear it probably will happen to someone at some point. 
So I took off the lids and the first impression of the shadows: wow that's glittery. I honestly didn't expect the glitter and if you take a peek at the looks that the CoverGirl team created (such as District 8), there's no shimmer in the looks and they're quite pigmented if you look at the photo.
Molten Black: a black shimmer
Red-Hot: a pink shimmer with gold specks
 So I tapped my finger into Molten Black...
 And....... it turned out awful. LOOK AT MY FINGER! THE HORRIBLE PIGMENTATION IS SITTING THERE.
 So I tapped my finger into the Red-Hot (the name is misleading, it's pink!) and the tip of my finger caught some pigment but the rest did not. Like, come on! That's horrible, CoverGirl!
 So I tried to swatch it on my arm and eventually, I got this much out of it (but my skin isn't that pale...) by the time I got this much pigment on my arm, my fingers were COVERED in pigment that doesn't stick - refer to second picture. They're really pretty colours but are they not going to stick? They stick to themselves but not to skin... great.

So overall, if you haven't noticed already, I kind of hate this shadow. If you look at when I took off the lids for the shadows, Red-Hot has a lot of powder sitting on the top so there's quite a bit of fall out and as you saw, no pigmentation!! I don't want to waste my Urban Decay Primer Potion on it but apparently I might need to because this does not stick to skin. I've done all of my reviews so far without the Primer Potion and if I'm going to use the $20ish product, I'd rather not waste it on products that need it rather than products that are already fabulous and just need an extra boost. These cost about $4 US and $5 CDN. 

Overall: 1.5/5 

xoxo, Michelle

Template developed by Confluent Forms LLC; more resources at BlogXpertise