Hello world! It's been a while since I posted but here's a review of the Urban Decay Naked Basics Palette.
The palette costs $27US/$32CDN and can be bought at your local Sephora.
There are 6 shades in the palette: Venus, Foxy, W.O.S., Naked 2, Faint and Crave.
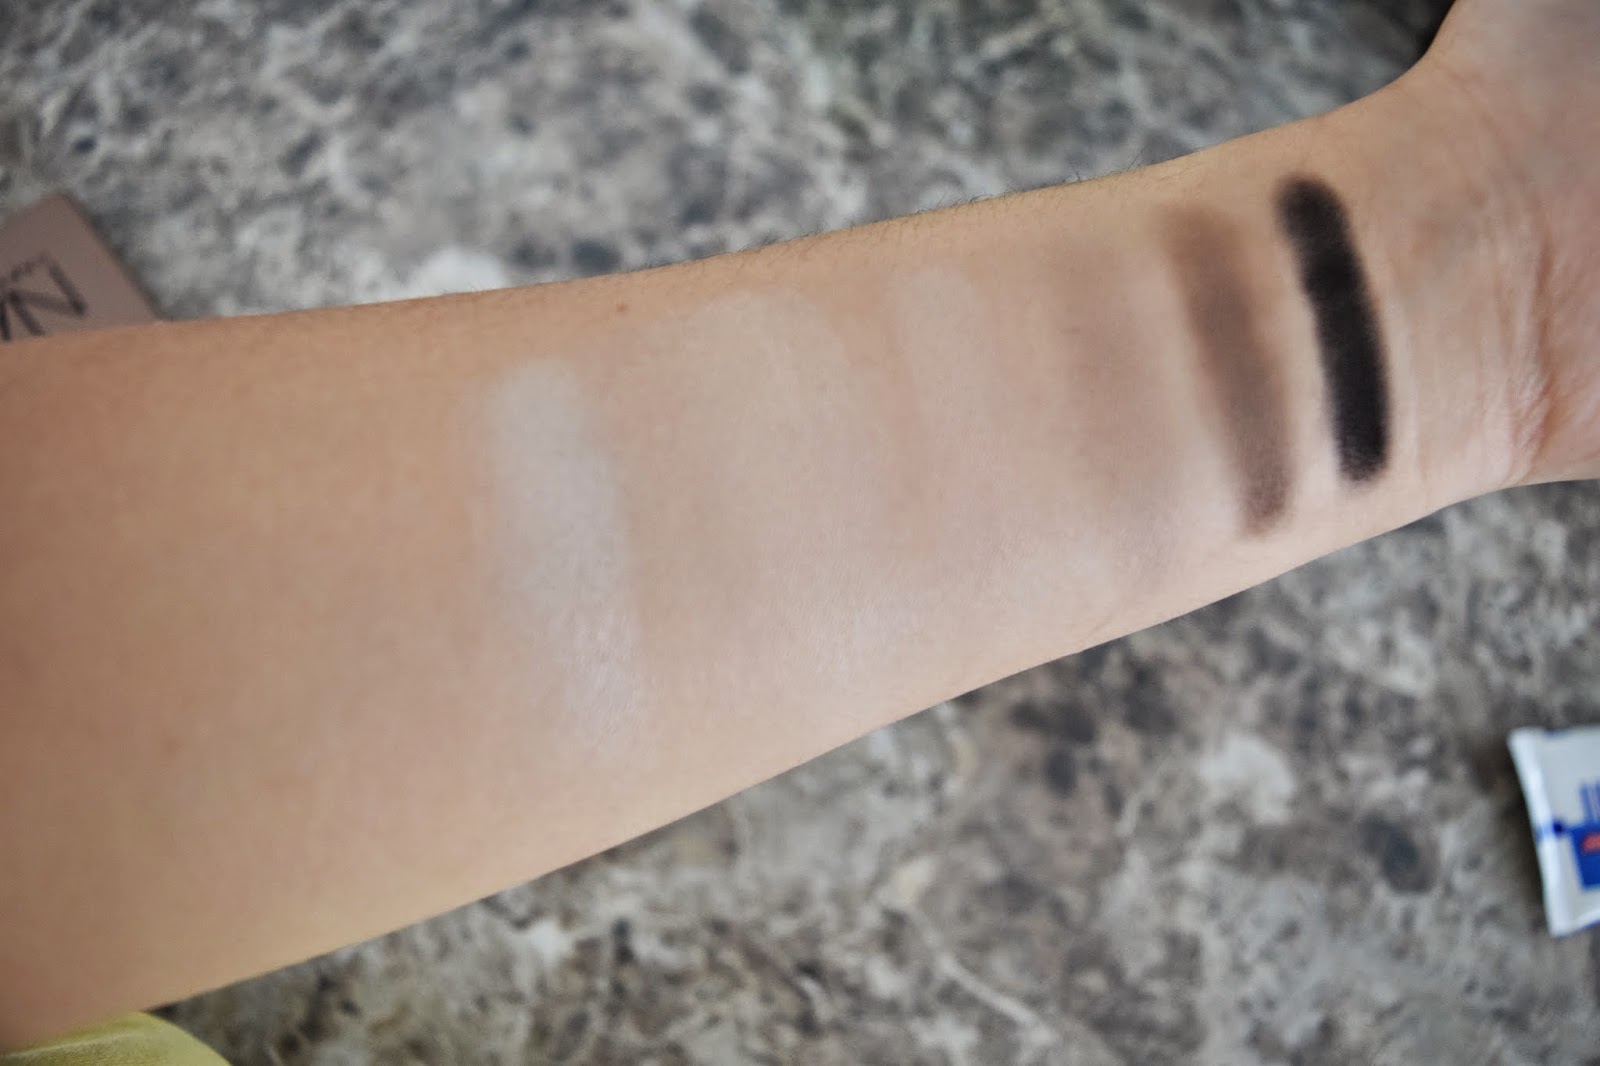
Venus: "Soft, Off-White Demi Matte"This is the only eyeshadow in the palette that isn't matte. Urban Decay said it is a "demi-matte" shade and it definitely isn't matte. The shade is more like a white shimmer and makes this eyeshadow BEAUTIFUL for highlighting your brow bone, inner tear duct or even the top of your cheekbones (if you don't have a separate highlighter for that). The shimmer is very fine and creates a subtle glow when applied but because there still is slight sparkle, there's a little bit of sparkle fall out. The eyeshadow is creamy and not too pigmented that the highlight is extremely bright.
Foxy: "Cream Bisque Matte" This eyeshadow is more of a yellow-toned neutral. It could be used as an all over lid color for those with more yellow skin tone or be a transitional color for fair skinned ladies. If darker or tanned skin tones used it, it could be used to create a glow that makes your eyes pop just a little bit more (as long as you don't try to pack on the yellow tones). Like Venus, the eyeshadow is very creamy and silky to the touch but once blended into my skin, I can't see it anymore (perfect match for my skin tone).
W.O.S. (Walk of Shame): "Very Light Nude Matte" This is a peach-pink based neutral eyeshadow. Both Foxy and W.O.S. would be great eyeshadows for a "no makeup makeup" look because they could easily cover up any veins or discolorations on your eyelid but not add anything too "unnatural". It's one of those shades that work in a subtle way and aren't necessarily noticeable but are great for blending! It also has a nice creamy and silky texture.
Naked 2: "Taupe Matte" This is when the palette becomes useful for blending or creating a smokey eye. Naked 2 is a neutral toned transitional color great for putting in your crease for subtle definition on those "no makeup makeup" days. It's a light brown shade with neutral to slightly warm tones. It's an easy colour to blend with and has good creaminess but not crazy pigmentation like all the other shades so far. I wouldn't necessarily call shade this taupe though...
Faint: "Warm Dusty Brown Matte" Faint is like a "milk chocolate brown" color to me. It is great for slowly adding definition when attempting a smokey eye or just blending in general.
Crave: "Deepest, Darkest Brown/Black Matte" I wouldn't call this shade brown because it is definitely black. It looks black in the pan and it looks black when you apply it. Crave is a pure black shade and is crazy pigmented. Unlike the other shades in this palette, Crave has a bit of a chalky pigment and does not apply as smoothly as the other shadows but can still be blended out.
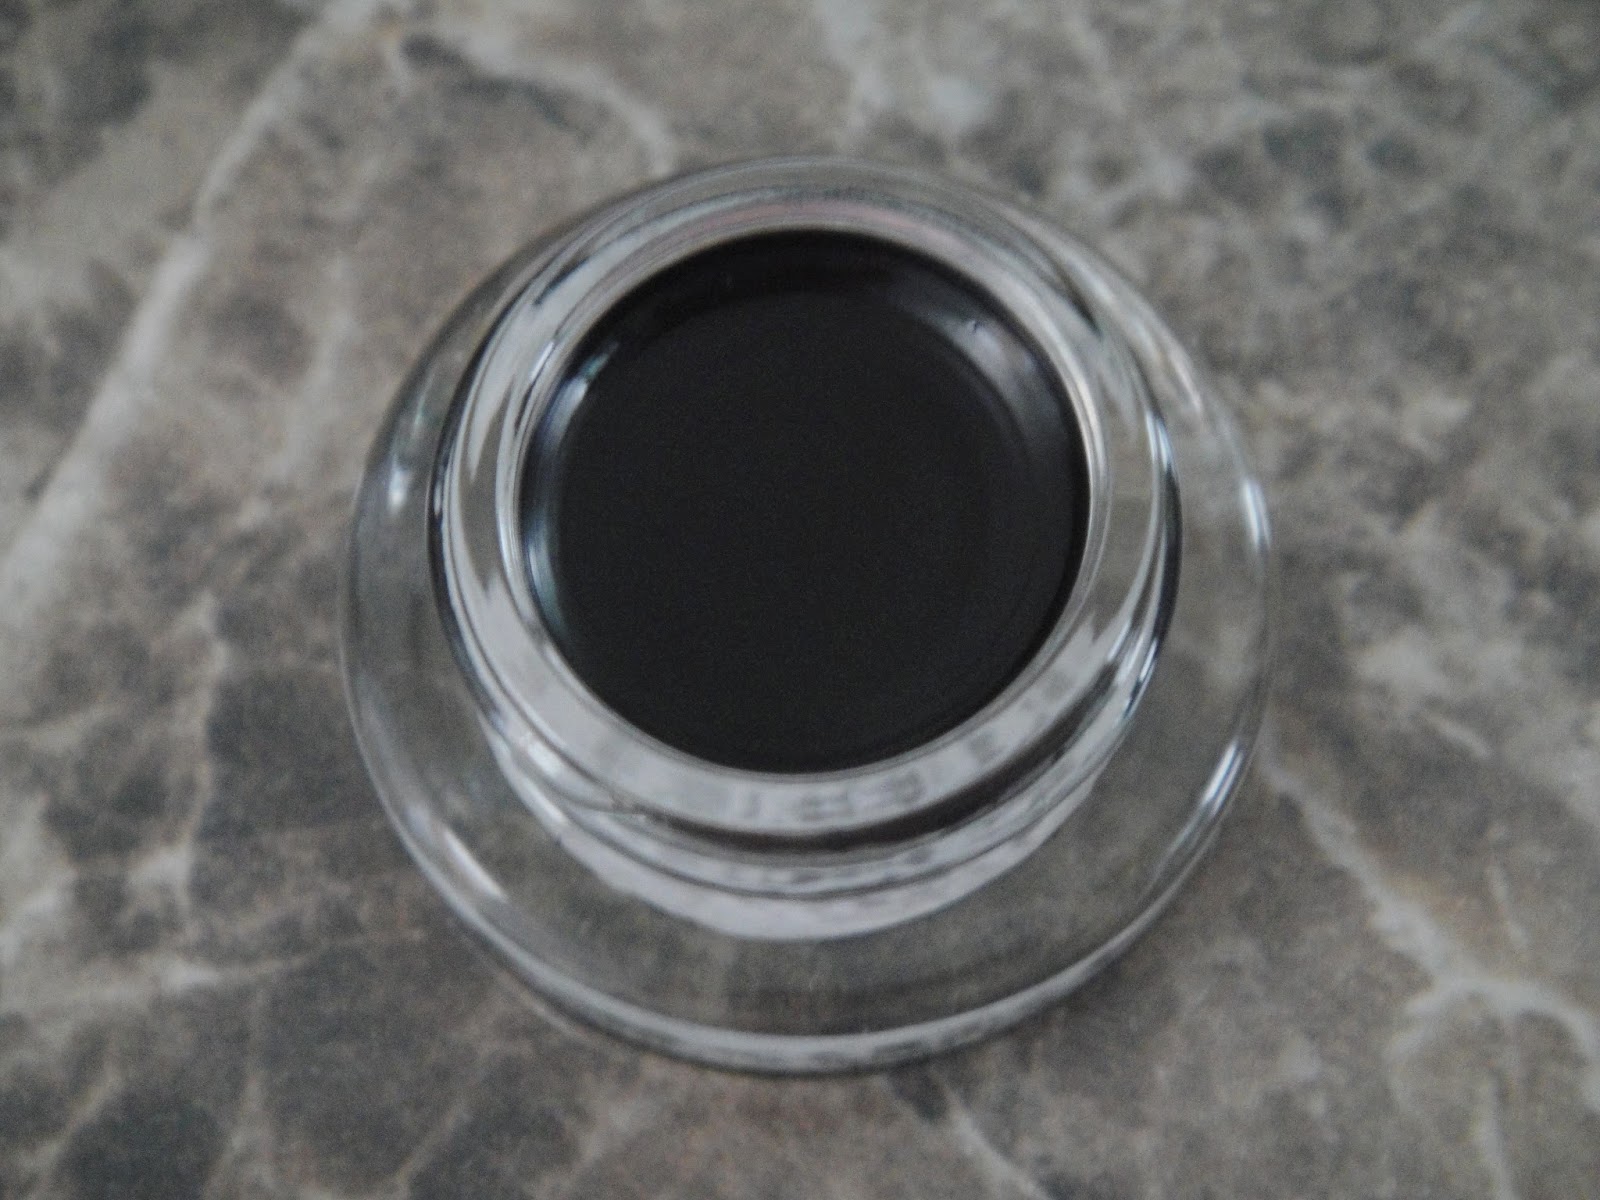
Overall, the palette is nice but I'm not sure if its necessarily worth my money. You're getting 6 eyeshadows for $27 (I bought it for 27 on the 15% off Sephora Beauty Insider sale) which equals $4.50 per shadow. Surely that's a good thing right? But if you look at the pictures, the eyeshadows are practically untouched. I don't use this palette much and I find that not all the colors appear on my skin (I'm not a huge fan of subtle sometimes) so this palette is still iffy with me. Also, this palette has a certain smell! If you go on makeupalley or some other website, people often describe the smell as "dog pee" but HOW DO YOU KNOW WHAT DOG PEE SMELLS LIKE? Honestly, it's not a pleasant scent and that turns me off from the palette but the smell is also one of those factors that if you concentrate on it, the smell just becomes more disgusting and repelling so I'm trying not to focus on it when I use these shadows...
Pigmentation: 3.5/5
Texture: 4.5/5
Overall: 4/5 (ignoring the smell)
xoxo, Michelle
P.S. Sorry if this post lacks my usual hyper-ness, I just haven't been in the mood lately (dealing with some boy crap) and I thought I should post something and stop being a bad blogger... I did get a new camera though so 1. these photos are much more high quality even though the background sucks and 2. I can film videos! I don't know if I will be filming video reviews/tutorials since I'm still such a noob to makeup but we'll see :)
Showing posts with label Makeup. Show all posts
Wednesday, August 20, 2014
Thursday, July 10, 2014
Review: Laneige Volume Setting Mascara
Hello blogsphere! I am here with a review! I would apologize for my absence since my last post but since I changed up the look of it, the date is no longer displayed MUAHAHAHAHAH okay moving on I'm reviewing the Laneige Volume Setting Mascara.
So I have been informed that Laneige is sold in Target USA, no? Well well, good for you Korean makeup brand! Laneige is like the "Dior of South Korea" in my opinion, based on typical quality and prices. Now this mascara is called the volume setting mascara. But when I tried it, I saw no change for volume but DEFINITELY for length. I have pretty long eyelashes but these made my eyelashes look sooo long that it looked very unnatural. But that's only because I already have the length and I just want additional volume. Another issue I have with this mascara is that it tends to group eyelashes together. I also have a lot of eyelashes (yay natural volume and length and curl) so when I saw that it made my lashes disappear and look like there's less, that was disappointing. It's supposed to give volume not take it away... Another disappointing thing about the mascara is that it clumps. I don't know if it's just because I've had the mascara for about a year (yeah yeah yeah there's germs but it's not like I use mascara everyday or share mascaras btw to whoever is reading this, never ever EVER share mascara!) but because I usually go a couple coats onto my lashes, sometimes a small black glob will attach to my lashes and make me sad :( if you haven't noticed yet, this is practically a post of negative things :/ sooo next, I find that the mascara doesn't hold my curl very well. I think it might be my eyelash curler (the Shu Uemura S Curler aka the small eyelash curler) because I don't like how I have to curl in sections but this mascara always straightens my eyelashes.... My aunt (a different one than the one who bought me my Shu Uemura collection) bought this as a gift and although I thank her for it, I personally wouldn't repurchase again. Strange how the mascara is specifically made for volume yet it did the opposite for me....
PROS:
-makes lashes pure black (help with blending into falsies?)
-lengthens lashes
CONS:
-takes away volume (maybe because I've already got the maximum volume natually??)
-leaves clumps on mascara
-doesn't hold curl very well
Rating : 1.5/5
xoxo, Michelle (:
Labels:
Makeup
Friday, May 30, 2014
Spotlight: Shu Uemura UV Underbase Mousse POREraser
Hi people! So last time this was one of my items in my Shu Uemura Super Collection day (only a super collection in my eyes) and I wanted to highlight it and make this one stand out cause it's probably one of my favourite products! And that is the UV Underbase Mousse POREraser!
Yeah this is the same picture of when I did my super collection day but it's okay, you guys don't really care do you? Okay so what it's supposed to do is its a mousse formula that minimizes pores and provides some kind of sun protection. So the interesting thing is that it can be used as either a primer or a foundation. BUT when I go to apply it, it's very very very sheer so it's probably better as a primer. But do you really want to pay so much for a primer? Nope! So I use it as my foundation/skin base when I have less breakouts and when its summer. That is because I found that if you use this product on dry skin, it can sometimes accentuate the dryness and cause flaking. So either use a moisturizer as a primer for this when you have dry skin, or use this when you're sweating and oily even though that sounds gross. One of the great things about this product is that it's a mousse so its very light and fun to play with because there's not a lot of mousse primer/foundations out there in my opinion. Honestly guys, I have a couple more research papers to write so this was a spontaneous thing and I'm going to keep it short.
PRO:
- light
- a little goes a long way
- more than one option of use
- minimize pores
- provide relative sun protection
CON:
- expensive
- sheer
- not necessarily for dry skin people
So you make a judgement for yourself. Do you want this product? I like it but I got it as a gift and its not as cheap where I live compared to where I bought it (on vacation). The choice is yours :)
Labels:
Makeup
Monday, May 12, 2014
Oh Jaclyn Hill
Oh hey just one more thing to whoever's reading this, I highly highly highly highly recommend going on YouTube and searching up "Jaclyn Hill"! She is one of the most amazing YouTube beauty gurus and I swear, I watch one of her videos a day even though she doesn't post daily. For some reason I just love hearing her voice and how weird she is! TMI? Yeah probably..... Well whatever, the point is that you should go subscribe to her on YouTube, follow her on Instagram, follow her on Twitter, visit her website, whatever you want to do! She is a professional makeup artist who worked for MAC for 4 years and she just recently stopped doing freelance work, I think she does a lot of photoshoots now! Well regardless again, her makeup tutorials are great and even if they look a little dramatic to you, you just need to adjust them to your own preferences! SHE. IS. AMAZE-BALLS.
https://www.youtube.com/user/Jaclynhill1
http://instagram.com/jaclynhill
https://twitter.com/Jaclynhill
http://www.jaclynhillmakeup.com/
https://www.youtube.com/user/Jaclynhill1
http://instagram.com/jaclynhill
https://twitter.com/Jaclynhill
http://www.jaclynhillmakeup.com/
Labels:
Makeup
Sleek MakeUP Oh So Special Palette - First Impression!
Hi people! Okay so it's been a long time since my last review on... Maybelline Eye Studio gel liner? Well, I just finished my AP biology exam this morning so after sitting around after school, I decided to write something different for people, like my first impressions! Okay so today's palette is a little different and it's called the iDivine Oh So Special Palette by Sleek MakeUP. My sister actually came back from London a little over a week ago and she brought this, among other things, back for me (I had to research and put in a request!) so I was and still am pretty excited about this! Let's get started...
General Info: Sleek MakeUP is a brand that originated in the UK. I asked my sister to buy it for me from Superdrug in London but Superdrug is a drugstore place so this is pretty much a drugstore item. For those of us who don't live in the UK, you can buy it online at Sleek's official website (here) and if you're one of those gals who like online shopping, then this is great.
Packaging: Sleek's iDivine palette collection all have black sleek cases like this even though the box outside (not shown here) is slightly different per palette. By looking online, I thought this would be a huge palette like Urban Decay Naked Palette size but I was so off! It's about the size of my hand which makes it great and easy to throw into my bag if I were to do touch ups and whatnot.
This is what the inside of the palette looks like. As you can see, there's a pretty big mirror (sorry about the ceiling fan) and then the 12 shadows on the bottom. In this palette, we have Bow, Pamper, Organza, Gateau, Ribbon, The Mail, Gift Basket, Boxed, Glitz, Wrapped Up, Celebrate and Noir.
As you can see from below, this palette really is brand new. Sleek tends to make their eyeshadows with a grid look when they're brand new so if you look really close, it's untouched!
Let's go over the shadows individually...
Bow - matte light tan colour (can be considered skin colour for fair-skinned ladies)
Pamper - matte bubble gum pink
Organza - metallic pink
Gateau - metallic lavender
Ribbon - matte coral, reminds me of MAC Free to Be
The Mail - matte camel colour (what I call true tan)
Gift Basket - metallic bronze
Boxed - matte light brown
Glitzed - metallic "cerulean frost"*
Wrapped Up - matte dark chocolate/cocoa/coffee (dark brown) colour
Celebrate - metallic "byzantium" colour*
Noir - matte black
* = sorry, I had to go through a colour dictionary to find out how exactly you can describe it, it gets boring if you call everything light or dark!
So I'm still a pretty bad swatcher.... but I got the job done and I put in some extra effort with the words this time! I think my swatches were good but my camera didn't capture them properly! In this photo, I got a picture of the majority of the shades EXCEPT although pamper is light, it's not that light! It's a beautiful almost baby pink shade that I plan on using sometime!
Because my hand makes the shades around my thumb look awful, i retook them from side view!
And this one below is Celebrate, it looked bad in all photos because it was on my index knuckle which is probably the most cracked and dry out of my entire hand.. Here is looks somewhat brown but it's actually a metallic dark purple (thats what byzantium is)!
GOSH I really love those colours! Looking at the colours in itself, you can create soooooo many different looks with this palette! All of the colours are great in pigmentation (although the Bow and Pamper aren't as pigmented compared to the others) and when you touch it, the eyeshadows feel buttery! Not powdery or chalky but buttery! Overall.... IM SO EXCITED TO PLAY AROUND WITH THIS PALETTE!!
xoxo, Michelle
Labels:
Makeup
Sunday, March 30, 2014
Maybelline EyeStudio Lasting Drama Gel Eyeliner in Blackest Black
Hello random reader who happens to stumble upon my blog (or it could be Jenika), I've decided to do a spontaneous review of the Maybelline EyeStudio Lasting Drama Gel Eyeliner and I have the "shade" Blackest Black (is black a shade?) I promise this post has less writing than last time!
Okay I opened the lid and this is what I got: ITS PERFECT AHHHHH sorry I'm weird but I love how its completely untouched and its a perfect little product. Unlike eyeshadows, you can easily tell whether or not a gel liner has been used (woohoo mine hasn't!)
So even though it's in the glass jar, you're actually only getting this much product. After using the eyeliner, man I can tell why people can really love it! It's a nice and creamy formula that goes on the lid (and hand) really well and has amazing pigmentation, this truly is blackest black.
It comes with an applicator! It's not my favourite thing in the world because I prefer a slanted eyeliner brush when it comes to my gel eyeliner but it would get the job done if you didn't have one.
Okay so I used three different brushes to see how the application would go. On the furthest left, I used the RealTechniques angled brow brush (sorry, not for my brows) then in the middle I used a brush that I got at Sasa in Hong Kong and then on the right is the applicator that comes with the eyeliner.
Wow lighting change! Well as you can see, the lines are all completely different but the product itself is the same. The RealTechniques line does have the extreme pigmentation in a single line but since it's relatively soft, there's a softer edge around the eyeliner that I don't necessarily care for. Then my Sasa brush created a nice and thick line with good pigmentation and no softness but I screwed up the straightness of it. Then the applicator on the right has a thin line but I find that the applicator got put on too much product right away on the top part of my line so I tried using it to distribute the product which led to the faded line. Meh.
The eyeliner claims to be smudgeproof and waterproof. Okay so I didn't test out the waterproof.... BUT it's definitely not smudge proof! I suggest putting black eyeshadow with the same slanted eyeliner brush to set the liner and make sure it doesn't crease or anything. Pressed/translucent powder might work too!
This product is almost always compared to the Bobbi Brown one which I haven't tried but honestly, this one is so much more worth it. This Maybelline one is about a quarter of the Bobbi Brown one and you're essentially getting the same thing. Most of the time, high-end-ish products end up nothing like drugstore ones but Maybelline does a pretty good job overall. Okay here's the end! So overall, I really like this product. It goes on really creamily (if that's a word) and has amazing black pigmentation in my opinion.
xoxo, Michelle
Labels:
Makeup
Wednesday, March 26, 2014
OMG ITS SHU UEMURA SUPER COLLECTION DAY
Heeey guys, this is what I've been building up to in the past 2 weeks, I'm going to show you my Shu Uemura collection of makeup and I feel that Shu Uemura is so under-reviewed! Maybe cause it's just not as popular in North America as in Asia but trust me, this brand is awesomeee! I got this entire collection as a 17th birthday present from my aunt Dorothy (<3) and when she hid the receipt from me, I just had to look at the prices online.... EXPENSIVE! Just a warning, this is going to be a very long post so lets go! Btw feel free to just skip to a certain item if its what you searched on Google and are thinking of buying but are questioning the price :)
[update]: I just wrote the entire post and it took about 3 hours. DON'T TRY TO READ EVERYTHING UNLESS YOU'RE A SPEEDREADER. God that took forever....
First off, this is the makeup case that I bought from Forever 21, I just thought that it's totally sophisticated and goes well with my Shu Uemura stuff, makes me feel classy and expensive hahaha
So this is what I have (forgot my eyelash curler and makeup brush cleanser) and yeah okay it looks like a wimpy "super collection" but come on, I'm a teenager and each item is really expensive so it's better than all drugstore, right?
Now after you've applied your base, you need a powder to set it. The one I have is the Dual Fit Pressed Powder in beige I think and it is what it is: a powder to set foundation/base.
This is the brush that comes along in the compact. As you can see, it's slanted which makes me wonder if it's a better fit for contouring with bronzer rather than setting your face with powder.
This is what the product actually looks like. As you can see, there are two different shades within the compact and they actually have two different purposes. The powder on the left side is darker and made for your entire face so it's the normal powder. But the one on the right is actually made to soak up excess amounts of oil, therefore it goes in your T-zone. I feel like this powder isn't always very necessary because other powders will do the same job for less (although without the T-zone thing) and might make my face have that glow too.
Next up is the Lasting Gel Pencil Eye Liner and I have the shade M Brown 02, and it costs about $24.
What I like about this eyeliner is that the pigmentation of the brown is great and the fact that it is a retractable pencil but sometimes, the pencil doesn't apply easily to my lid. I think it's better to draw a line on your arm first and warm up the pencil then go for your eye because if you go straight to the lid, you might have to go over the line and pull and tug a bit (which is bad) in order to get the beautiful brown to come out. Swatch is coming up later
This one is the Eye Light Pencil and obviously, mines white. It costs about $19 and has one side which is matte and the other which is pearly with shimmer. The matte side is great on the lower lash line and water line if you want to create a comic book character's huge eyes or just make your eyes look bigger overall whereas the pearl side is great for the inner tear duct where it just brings a nice highlight without being too overpowering. I think the pearl would also work under the brow bone but needs to be blended out a bit.
So these are the swatches of my pencil eyeliner. As you can see, the retractable brown pencil is a very nice brown colour and for the eye light pencil, the pearl is very shimmery and the matte is truly matte. The pigmentation for all of these eye liners are great and what you see in the tube is what you will get on your eyes.
Next is the Hard Formula in hard 9. Hard 9 is actually a pretty interesting colour because its a darker greyish-brown that looks really nice on my black brows. I couldn't do a swatch of this colour for you because the cool thing is, the pigmentation is only released when it detects the oil on your brow hairs. That is cool. That is technology. That is approximately $23.
I apologize for my brows and my hair and my face overall but mostly brows, I reaaaaally need to get them done soon so its like ahhhhhhh but thats how they taught me to use the brow pencil. If you buy it at Shu Uemura specifically and not Sephora, they will sharpen and cut the pencil like this for you, which makes it even better for your use.
So as you can see from the picture below, I have long eyelashes (yay!) so all I have to do is curl the top ones, right? RIGHT.
This is the New Generation Eyelash S Curler for about $24. It was specially made for those people with eyes that don't necessarily fit into the general shape of regular eyelash curlers. This curler has both positives and negatives in my opinion:
PRO: its smaller and easier to carry around
CON: the plastics that cover it sometimes slide off
PRO: good for those with different eye shapes
CON: you have to curl your eyelashes in sections which may make them uneven/unequal in their curl
So I guess in some ways, it's easier for people who are scared of poking themselves with a regular eyelash curler (?) and give people new options because this kind of eyelash curler has never been done. BUT you need quite a bit of control in order to get the same uniform curl throughout your eyelashes
BUT you can change things around and on the palette where it says shu uemura, you have to lightly pull and it will just slide out for your convenience so based on what colours you want to wear, you can change it up and carry it with you.
So these are the swatches for the eyeshadows, there is a light purple shimmer, matte lavender and a matte deep plum in Allure Mauve (the purple eyeshadow trio) then there's a gold shimmer, matte pale yellow-gold and dark matte brown in Gypsy Brown (the brown eyeshadow trio). The two solid colours are always very pigmented (especially the darkest one) but the shimmer usually has quite a bit of fallout therefore I usually just pack it on as pigment over top of the look I created with the other two shades. Just a reminder, YOU NEED EYESHADOW PRIMER TO MAKE IT LAST LONGER AND MORE BEAUTIFULLY!
Here is the pink blush, and I'm told it's called Sweet Pink, isn't it gorgeous? Honestly, the colour pay off is much better when you use a brush but this is what I managed to swatch for you. I wear this blush whenever I do my full Shu Uemura face makeup and I swirl the two colours together in the pan, so its a highlighting blush. I think the rosey pink also would look great on many skin tones and bring out the natural flush in your cheeks!
Again, apologies for bad camera....
Next is the 5R brush which is made of full kolinsky. If you know anything about kolinsky or this post just inspired you to Google it, it's some kind of weasel-animal that comes out once a year or so and it's fur is hard to collect therefore that justifies how this brush is $75CAD/$60USD... Wow right? Good thing my aunt bought this for me in Hong Kong where it's little over $50... That is A LOT for one single brush, especially since I don't really know how to use it properly. The way the store taught me is that you tilt the brush and apply on the slant (the brush should not look like it could stab you in the eye). But its actually quite nice at application and has pretty firm bristles but is still soft enough to blend slightly if you wanted it to (even though that is definitely not suggested).
Sheer and slightly coral-pink when applied... I'm sorry, I don't typically like these kinds of glosses (I'm more of a lipstick/lip balm person) but it seems pretty smooth and when I touched it afterwards, it wasn't sticky so that's definitely a plus! How sheer it is definitely wasn't what I was expecting though....
[update]: I just wrote the entire post and it took about 3 hours. DON'T TRY TO READ EVERYTHING UNLESS YOU'RE A SPEEDREADER. God that took forever....
First off, this is the makeup case that I bought from Forever 21, I just thought that it's totally sophisticated and goes well with my Shu Uemura stuff, makes me feel classy and expensive hahaha
So this is what I have (forgot my eyelash curler and makeup brush cleanser) and yeah okay it looks like a wimpy "super collection" but come on, I'm a teenager and each item is really expensive so it's better than all drugstore, right?
This is the POREraser UV Under Base Mousse in beige and it costs about $50. This product can be used as a primer or be a sheer foundation. What I love about this product is that it's a mousse and you get cream, powder or liquid foundations so this is something new and because it's a mousse, it's light and doesn't feel heavy on the skin. The only thing I would caution about is that it is again quite sheer and I don't recommend this for dry skin because it might sink into those dry spots on your face and will start flaking. I personally use this in the summer when I tend to be a bit more oily and that way, it gives me a nice and dewy finish. Also because this is one of Shu Uemura's top products, they have quite a bit of tutorials on their website and it even shows you step by step in pictures if you're too lazy to watch the video. The way I was taught at my Shu Uemura class (my aunt's perks of being one of their insider club thing) is that you shake the bottle approximately 5 times then pump out a lychee sized bubble of product onto your palm. Make sure that the bottle stays upright when it dispenses and you are turning your hand, not the bottle. Overall, a nice product but I'm not sure if I would get a new one once this one runs out
To apply the base, my aunt bought me their pentagon sponge. There's 4 in a package and the package is about $7. Although this sponge is made with natural latex, I find that it doesn't soak up product like most natural products and its very bouncy but it's still only a sponge and four for $7? Not necessarily worth the price when I can get so many sponges for less if I drop the brand name.Now after you've applied your base, you need a powder to set it. The one I have is the Dual Fit Pressed Powder in beige I think and it is what it is: a powder to set foundation/base.
This is the brush that comes along in the compact. As you can see, it's slanted which makes me wonder if it's a better fit for contouring with bronzer rather than setting your face with powder.
This is what the product actually looks like. As you can see, there are two different shades within the compact and they actually have two different purposes. The powder on the left side is darker and made for your entire face so it's the normal powder. But the one on the right is actually made to soak up excess amounts of oil, therefore it goes in your T-zone. I feel like this powder isn't always very necessary because other powders will do the same job for less (although without the T-zone thing) and might make my face have that glow too.
Next up is the Lasting Gel Pencil Eye Liner and I have the shade M Brown 02, and it costs about $24.
What I like about this eyeliner is that the pigmentation of the brown is great and the fact that it is a retractable pencil but sometimes, the pencil doesn't apply easily to my lid. I think it's better to draw a line on your arm first and warm up the pencil then go for your eye because if you go straight to the lid, you might have to go over the line and pull and tug a bit (which is bad) in order to get the beautiful brown to come out. Swatch is coming up later
This one is the Eye Light Pencil and obviously, mines white. It costs about $19 and has one side which is matte and the other which is pearly with shimmer. The matte side is great on the lower lash line and water line if you want to create a comic book character's huge eyes or just make your eyes look bigger overall whereas the pearl side is great for the inner tear duct where it just brings a nice highlight without being too overpowering. I think the pearl would also work under the brow bone but needs to be blended out a bit.
So these are the swatches of my pencil eyeliner. As you can see, the retractable brown pencil is a very nice brown colour and for the eye light pencil, the pearl is very shimmery and the matte is truly matte. The pigmentation for all of these eye liners are great and what you see in the tube is what you will get on your eyes.
Next is the Hard Formula in hard 9. Hard 9 is actually a pretty interesting colour because its a darker greyish-brown that looks really nice on my black brows. I couldn't do a swatch of this colour for you because the cool thing is, the pigmentation is only released when it detects the oil on your brow hairs. That is cool. That is technology. That is approximately $23.
I apologize for my brows and my hair and my face overall but mostly brows, I reaaaaally need to get them done soon so its like ahhhhhhh but thats how they taught me to use the brow pencil. If you buy it at Shu Uemura specifically and not Sephora, they will sharpen and cut the pencil like this for you, which makes it even better for your use.
So as you can see from the picture below, I have long eyelashes (yay!) so all I have to do is curl the top ones, right? RIGHT.
This is the New Generation Eyelash S Curler for about $24. It was specially made for those people with eyes that don't necessarily fit into the general shape of regular eyelash curlers. This curler has both positives and negatives in my opinion:
PRO: its smaller and easier to carry around
CON: the plastics that cover it sometimes slide off
PRO: good for those with different eye shapes
CON: you have to curl your eyelashes in sections which may make them uneven/unequal in their curl
So I guess in some ways, it's easier for people who are scared of poking themselves with a regular eyelash curler (?) and give people new options because this kind of eyelash curler has never been done. BUT you need quite a bit of control in order to get the same uniform curl throughout your eyelashes
Next is the fun stuff, eyeshadow and blush. Now everything that I have below is from their Eyeconic Collection from summer 2013 so these might not be available anymore but I feel that they might represent eyeshadows somewhat well. So as you can see below, I have put one eyeshadow and one blush in each travel palette. Isn't the case pretty? The case itself cost about $14USD I think, each blush is about $42CAD/$35USD and each eyeshadow trio is about $?CAD/$30USD.
So these are the swatches for the eyeshadows, there is a light purple shimmer, matte lavender and a matte deep plum in Allure Mauve (the purple eyeshadow trio) then there's a gold shimmer, matte pale yellow-gold and dark matte brown in Gypsy Brown (the brown eyeshadow trio). The two solid colours are always very pigmented (especially the darkest one) but the shimmer usually has quite a bit of fallout therefore I usually just pack it on as pigment over top of the look I created with the other two shades. Just a reminder, YOU NEED EYESHADOW PRIMER TO MAKE IT LAST LONGER AND MORE BEAUTIFULLY!
Okay so I actually forgot to swatch the blushes for you so I had to get up and do it... So first, I'm doing the orange blush named Fresh Apricot. On my skin tone, it looks great as I get it on my fingers but once I swatch it on my arm....
Oh my gosh my arm doesn't have a dark area after the pigment, that's just the camera shadow! And sorry for the finger in the top left hand corner... Anyways, you can't see the shimmer! It's actually right below the orange and that's also why I think it works best as a highlight when I apply this orangey blush. I actually haven't used it much yet (as seen from the pan) but that's what I'm hoping to research now as we head into spring trends and the sun-kissed glow look.Here is the pink blush, and I'm told it's called Sweet Pink, isn't it gorgeous? Honestly, the colour pay off is much better when you use a brush but this is what I managed to swatch for you. I wear this blush whenever I do my full Shu Uemura face makeup and I swirl the two colours together in the pan, so its a highlighting blush. I think the rosey pink also would look great on many skin tones and bring out the natural flush in your cheeks!
Again, apologies for bad camera....
IF YOU ARE STILL HERE AND READING, GOOD JOB FOR PERSEVERANCE! WE'RE ALMOST DONE!
My aunt went crazy and also decided to buy me two brushes: the 5R and the 17.
First below is the side view of the 17 brush. It's a blush brush made of pony and squirrel hairs so its completely natural and tapered as you can see from the side view. From having this about 8 months now, it actually hasn't lost many hairs although a few have frayed and I think it's really nice for swirling blush because of the softness. I don't think this brush is available in North America but it is about $50 in Hong Kong (where I got it). Next is the 5R brush which is made of full kolinsky. If you know anything about kolinsky or this post just inspired you to Google it, it's some kind of weasel-animal that comes out once a year or so and it's fur is hard to collect therefore that justifies how this brush is $75CAD/$60USD... Wow right? Good thing my aunt bought this for me in Hong Kong where it's little over $50... That is A LOT for one single brush, especially since I don't really know how to use it properly. The way the store taught me is that you tilt the brush and apply on the slant (the brush should not look like it could stab you in the eye). But its actually quite nice at application and has pretty firm bristles but is still soft enough to blend slightly if you wanted it to (even though that is definitely not suggested).
I'm tired of sounding pretty... FREE LIPGLOSS SAMPLE.
Red in the bottle.....Sheer and slightly coral-pink when applied... I'm sorry, I don't typically like these kinds of glosses (I'm more of a lipstick/lip balm person) but it seems pretty smooth and when I touched it afterwards, it wasn't sticky so that's definitely a plus! How sheer it is definitely wasn't what I was expecting though....
THE LAST ITEM! Brush cleaner. Okay so since my brushes are really expensive, I trust the brand it came from to give me nice brush cleaner. So Shu Uemura's brush cleaner is nice and cleans the brushes really well except two problems:
1. it smells REALLY strongly of alcohol
2. my brushes love to just soak it up
#1 is what turns off a lot of people from using this brush cleaner and push them towards MAC's instead but with my expensive Shu brushes, I think I'll stick to trusting Shu. This is good for a spot clean and it will dry in a few hours without the smell (thank God) but if you look at my bottle, i already went through about a quarter. Unfortunately, I've only used this brush cleaner about 3 or 4 times and my Shu brushes just suck up the formula. What I love about this cleaner is that it leaves my brushes extremely soft so I think I'll have to see what happens... Btw the cup next to it isn't included, it cost a little over a dollar and then I realized that it's not really worth it but it's not like I'll put strong alcohol in my hands #eczemaproblems
THATS IT. I'M DONE. PEACE!
xoxo, Michelle
Labels:
Makeup
Subscribe to:
Posts (Atom)